Showing posts with label cosplay. Show all posts

Sunday, January 17, 2016

Spring Line 2016 Circlets and Tiaras by aBeesCreations


I put my Etsy shop on vacation during December and I am happy that I have reopened it this week. There are a lot of changes that I am making to the products I am going to offer in my shop. 
Not only will you find my Starlet Art Print, fun accessories and jewelry gifts for under $5, but I now will be listing props and costume items. 
I have been working hard to create a new spring line of unique crowns, tiaras and circlets. All handcrafted and are original designs. 
I hope to list at least 3 new items weekly. Here are a few examples of the items I have created for this 2016 spring season.

Fayette Tiara $40
Now Listed on www.etsy.com/shop/aBeesCreations

Lady Anne $40
Not listed yet will be soon. It is currently available so please message me for details on facebook. www.facebook.com/ABeesCreations 


Wadjet Circlet $45
Now Listed on www.etsy.com/shop/aBeesCreations

Dorian Circlet $30
Not listed yet will be soon. It is currently available so please message me for details on facebook. www.facebook.com/ABeesCreations 

Cora Tiara $45
Not listed yet will be soon. It is currently available so please message me for details on facebook. www.facebook.com/ABeesCreations 

Tatiana Circlet $50
Not listed yet will be soon. It is currently available so please message me for details on facebook. www.facebook.com/ABeesCreations 

Leona Circlet $35
Not listed yet will be soon. It is currently available so please message me for details on facebook. www.facebook.com/ABeesCreations 

Queen Flora Fairy Crown $95
 Stands 12 inches high and has over 750 beads. 10 hours of hand beading to create this lovely piece.
Not listed yet will be soon. It is currently available so please message me for details on facebook. www.facebook.com/ABeesCreations 

Lady Rose Tiara $50 
Not listed yet will be soon. It is currently available so please message me for details on facebook. www.facebook.com/ABeesCreations 

Ella Circlet $30
Now Listed on www.etsy.com/shop/aBeesCreations


Wednesday, December 23, 2015

Clara Oswald meets The Raven

Are you a Doctor Who fan? 
I am, have been for years! 
In my adventures in the cosplay world I have met some great Doctor Who cosplayers. 
I did an artist spotlight this summer on one of my favorites, Blundergirl Whovian aka Amanda Cole.
Read it here.

Amanda is such a wonderful artist. She shows her own creativity in her take on Doctor Who and the characters we have grown to love, hate and fear. In 2015 she did a year of the companion. WHAT FUN!


To end her year she did a photo shoot being Clara Oswald.
Now if you havent seen the last part of the fall season 2015... 
STOP READING NOW SPOILERS!


For those who have seen the episodes, Amanda's take on her Clara.
......
.........
..................

Clara on the Orient Express meets Clara FacesThe Raven. 

Amanda contacted me about purchasing my black feather neckpiece, black wings and my black feather hat. 
She uses them for this concept. 
Dakota Friend of Friendly Fire Fotography shot this finally shoot. 
Makeup and Studio space by Krista's Beauty and Bliss

Here are some of the photos from the shoot. Thanks Amanda for allowing me to be a part of your journey. 


Please go give Blundergirl Whovian's pages a like:
www.facebook.com/blundergirl.whovian
www.etsy.com/shop/blundershop

You can find everyone else at these links:
Photographer: Friendly Fire Fotography at
www.facrbook.com/FriendPhotos

Makeup Artist and Studio Space:
Krista's Beauty and Bliss at
www.facebook.com/kristasbeautyandbliss

aBeesCreations at
www.facebook.com/ABeesCreations
www.etsy.com/aBeesCreations

Wednesday, November 25, 2015

Osiris God of Death/ Fight For Humanity

Back in Spetember I had the honor of being a judge at the MAXCON cosplay contest. While there I met a great group of LARPers. Their group PHLARP had amazing weapons, wardrobes, and character development. As judges myself and the other 2 judges were so impressed with their OC (original characters) cosplaying that 3 of the PHLARPers swept the judging! 
After the contest I had the opportunity to talk to the 3 of them. They are so dedicated and so talented. I mentioned that I am always looking for models for some of my projects, mentioning the Fight For Humanity photo series. The guys were excited about maybe branching out to model. 
So when I decided to shoot Ares the Greek God of War and Osiris the Egyptian God of the Dead, I asked Jason Smith (Ares) and Aaron Metcalf (Osiris) if they would want to model for them. They quickly agreed. 
As they were traveling from Farmington Missouri, I choose to shoot in Lebanon Missouri. Unfortunately there was a misunderstanding between the director of the land I had requested to shoot on so we got shut down within the first hour. (It happens)
So we moved to Springfield Missouri. Jason, Aaron and Jason's girlfriend Rachel were so wonderful and agreed to travel the additional distance with us. 
Our photographer for the day was Dakota Friend of Friendly Fire Fotography and our Makeup artist was Lexy Morrison, both of who both attended the Haunted House Clinic the day before. 

So I am going to write 3 blog posts about this day, this being the second one. Check out the Ares post here. We not only shot Osiris and Ares but also shot the LARPers having fun and shot Rachel in some great light. 

If you are in the Farmington/ Park Hills area in Missouri, please check out these guys and their LARPing group. And check them out on Facebook here: www.facebook.com/Phlarp/

Osiris Welcomes you to Death. 
Model: Aaron Metcalf
Makeup Artist: Lexy Morrison
Photographers and Photo Editors: Friendly Fire Fotographer and AJ Blanton
Concept, Wardrobe, Props: aBeesCreations 


Thanks Aaron, Jason and Rachel. 

Monday, September 14, 2015

MAXCon

When I was vending at OZCon in June, I met some wonderful people who were putting on a new con, MAXCon in Farmington Missouri.
I was asked to not only be a vendor there but to be a judge at the Cosplay contest. I was so excited to become a part of a brand new con. 

My husband Tom and one of Dakota's best friends Kali traveled with me to help with my booth while I was judging the contest. 
THANKS TOM AND KALI!

I had a blast! 
Here is my booth. 


I got to introduce some of my new cosplays as well as work the convention. I didnt want a cosplay that was too difficult to work in.
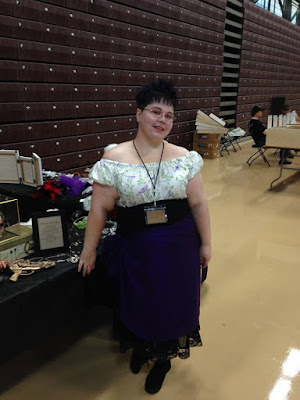
Saturday morning, Gypsy Jean made her appearance.

Shirt made by Casey July of The July Studio

Saturday afternoon, Punk Wednesday Addams made her appearance. She also was one of the judges during the cosplay contest. 


On Sunday, Totoro made its appearance.


I had so much fun not talking and giving out golden acorns to anyone who knew who I was. :)

Cant wait until next year.
If you want to be there here is a link to the website for MAXCon
Hope to see you there.


Monday, June 29, 2015

aBeesCreations at OZ Con West Plains


Me in my Tardis dress and custom made blue and black circlet.


This last weekend I was invited by Michelle of Remember Me Jewelry to attend Oz Con in West Plains, Missouri. 

We were vendors for this event. It was so much fun and I meet some amazing people. 
Oz Con is still in its infancy, being its 2 year.
It was small but I will be attending again next year!


Of course there was a lot of gaming, LARPing, and cosplaying going on. 


Check out there Facebook page:

www.facebook.com/OzCon

Here was our shared booth!


Masks, hats and accessories by aBeesCreations
Bottle Cap jewelry by Remember Me Jewelry


I had some very HAPPY customers! Most of them purchased their own circlets!


Hope to see everyone next year!

To order your own custom circlet please contact me at

 www.facbook.com/ABeesCreations 

or on Etsy at 

www.etsy.com/aBeesCreations


Thursday, April 3, 2014

Steampunk Gun Tutorial

This week I wanted to share with you an easy and very inexpensive way to make a Steampunk Gun. 
First gather your supplies:
A medium size squirt gun - I got BRIGHT ORANGE one at Wal-Mart for under $2
Spray Paints - Black,and Metallic paints - I used gold and silver.
If you did the steampunk goggle tutorial you should have plenty of spray paint left over.
Hot Glue Gun, Hot glue sticks or a strong glue like E6000
Scissors
Embellishments - Gather what you have! I used a pair of $1 earrings, a small plastic tube, some metal brads and a small gear, and some wire ribbon.
Paint Brushes
Acrylic paint in metallic tones and black. 

That is all I used but you can make this as elaborate as you want.
TOTAL COST FOR MY STEAMPUNK GUN - under $10

Now to start:
1. Take your squirt gun and in a well ventilated area spray paint a base of black. Let dry and repeat process for 2 coats.  

2. Once base coat is dry add a few more coats of metallic spray paint, alternating colors. I first sprayed gold, then silver. Let dry.


3. Lightly sand the gun and then add more layers of paint. Repeat this process until you are happy with the patina. *I spray painted the small black plastic tube embellishments  with the same process as the gun*


4. Gather your embellishments

5. Start gluing, using either the glue gun or the E6000, embellishments to the gun. I started by adding a few medal brad tops(BTW, It is easy to remove the brad prongs and just use the tops.)  to points on the gun where I thought they looked like they could realistically belong. I then added a metallic wire ribbon that I cut in half to the "seam" of the gun.

6. Now to make the "scope". I took the $1 store earring apart and just used the inner filigree pattern. Paint with spray paint if needed. Glue this filigree circle to the painted small black plastic tube. This creates a UNIQUE "scope" for your gun.


7. After the "scope" is dry attach it to the top of the gun with glue. I used E6000 with a touch of hot glue to help stabilize it.

8. Using the metallic and black acrylic paints add finishing touches and depth to the gun.


9. I almost stopped there but felt the gun needed something else..... so I added a small gear at the tip of the barrel.


10. ENJOY!!!

I hope you enjoy creating your own version of this gun. It is a great beginners Steampunk project for a low cost. 

You can also find tutorials, and articles by me @ Skyward Gears.com (There is a link at the top of the blog.

If you want to order a custom steampunk piece please contact me @ 
www.facebook.com/aBeesCreations
or 
www.etsy.com/shop/aBeesCreations

Monday, March 17, 2014

Steampunk Goggle Tutorial: Easy Level

Steampunk Google Tutorial #1: Easy Level by AJ

First gather your tools and supplies.

1 pair of inexpensive swim goggles.
 I got mine at our local dollar type store for, you guessed it, a whole dollar.

Inline image 1

Metallic colored spray paint. 
Your choice in colors. I use a silver and a gold to enhance the style and give the goggles a layered aged look.

Ribbon or leather cording
I used a metallic colored ribbon with metal threads. 
(If you use the leather cording you may have to sew it onto the plastic so a needle and thread will be added.)

Hot glue gun and glue sticks.

Wire, Nuts, Gears, and such to use as embellishment.

Total cost of supplies should be $7 to $15. Of course that depends on the embellishments you use. I had the spray paint on hand so I didn't have to purchase any for this project.

Directions:
1. Take the goggles apart by pushing the lenses out and removing the head strap.

2. Spray paint the frames with your choice of metallic spray paint.
BE SURE YOU ARE OUTSIDE OR IN A WELL VENTILATED AREA.

Inline image 2

I layered two colors, gold and silver to get a aged look.

Inline image 3

3. Pick whether you want to use leather material or cording or ribbon. I chose a metallic ribbon because I wanted to keep this simple and didn't really want to sew today. 

Inline image 5

If you chose to use leather or leather cording you will need a thick need and thread that matches the color of your leather. You will then hand stitch the leather to the suction area of the lenses.

Inline image 4
But like I said I didn't feel like sewing today so I opted for ribbon. I chose a ribbon with metallic threads. 

4. Using a hot glue gun attach the ribbon to the suction area of the lenses. Be Careful not to get glue on the actually lenses, especially if you want to actually see out of these. 

Inline image 6
Inline image 7

Make sure to fold over the ribbon and finish the inside as well as the outside.

5. After the paint is dry and the suction area is covered in the material, pop the lenses back into the frame.

Inline image 8
Inline image 9

6. Reattach the head strap to finish reassembling the goggles.

Now you could finish here.

Inline image 11 Inline image 12

But that is NOT much fun now is it?

7. So now for the FUN part! Embellishments!!
I chose gears, a washer, a nut, and some copper colored ribbon wire.  Wrap the wire around your embellishments and through the side strap slits. wrap wire tightly and in a pattern you like. 
Finish up with some hot glue to stabilize the embellishments if needed.

Inline image 10
Inline image 13
Now if you want you can spray the head  strap and ribbon. Just be careful to tape the lens to keep visibility intact.

Inline image 15
Inline image 14

Hope you enjoyed my first tutorial. 
Happy Fabricating!

If you would like to purchase custom made steampunk goggles or other accessories please contact me. 
You can find my Art and Accessories for sale online at
or 

Search This Blog